
Have you ever found yourself staring at your My Passport for Mac, wishing it were as organized and efficient as you need it to be? You’re not alone.
Many people face challenges when trying to reformat their external drives, especially when transitioning between different operating systems. The good news is, reformatting your My Passport for Mac doesn’t have to be a daunting task. In fact, it can be a straightforward process that opens up a world of possibilities for better file management and enhanced performance.
Imagine the satisfaction of knowing exactly how to reformat your drive, making it perfectly compatible with your Mac. Picture the ease of accessing your files and the improved speed and efficiency that comes with a clean slate. This guide is designed to give you the confidence and know-how to tackle the task with ease. With simple steps and clear instructions, you’ll transform your My Passport into a seamless part of your digital life. Ready to unlock the full potential of your external drive? Let’s get started!
Preparing Your Mac
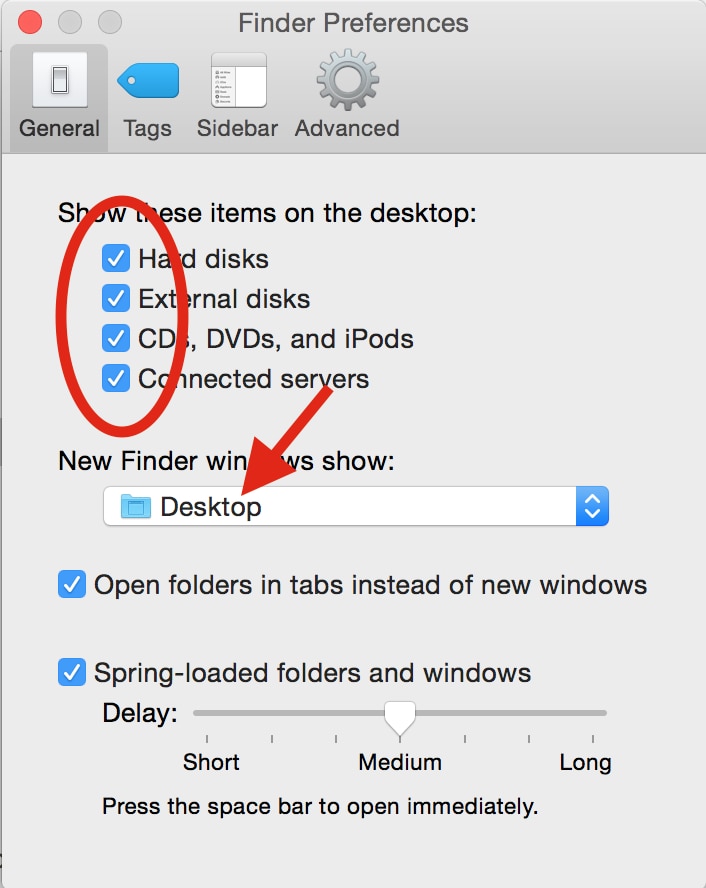
Your Mac needs some checks before reformatting. Start by ensuring all important files are backed up. Without backup, files can be lost forever. Next, check your Mac’s system updates. Updated systems work better and prevent errors. Use the App Storefor updates. Confirm that your Mac recognizes the My Passport drive. Connect the drive using a USB cable. Look for the drive on your desktop or finder. If it’s not visible, try reconnecting the cable. Sometimes cables don’t fit well.
Open the Disk Utility app on your Mac. This app helps manage drives. It allows formatting and checking disk health. Find Disk Utility in the Applications folder. Search for it using the spotlight tool if needed. Once opened, select the My Passport drive from the list. It’s usually on the left side. Double-check the drive name before selecting.
Credit: recoverit.wondershare.com
Connecting My Passport
Connect My Passportto your Mac using the USB cable. Make sure the cable is plugged in properly. Your Mac should detect the drive automatically. Wait a few seconds for it to appear on your screen. Check the desktop for the drive icon.
If the drive does not show up, check the cable again. Ensure it’s not loose. Try plugging it into a different USB port. Sometimes the port can be faulty. If it still doesn’t appear, restart your Mac.
Open Finder to locate My Passport. Look under the ‘Devices’ section. Click on the drive name to access its files. Ensure you can see all your files. This means the connection is successful.
Opening Disk Utility
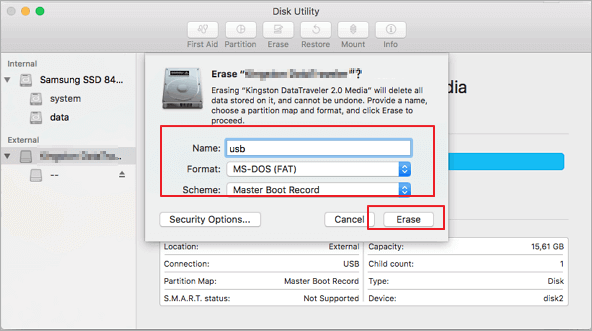
To start reformatting, find the Disk Utility on your Mac. It’s in the Applications folder. First, open the Finder. Then, click on Applications. Look for the Utilities folder inside. Click to open it. Inside, you’ll see Disk Utility. Double-click it to launch.
Once open, you’ll see a list of drives. These are on the left side. Find your My Passport drive. Click on it to select. Make sure you choose the right one. This step is very important. Double-check if needed.
The next step involves formatting. You’ll see an Erase tab at the top. Click on it to start the process. Choose the format type. Mac OS Extended is often the best choice. Now, click Erase to reformat your drive.
Credit: www.easeus.com
Choosing The Drive
It’s important to choose the right drivebefore starting. Look for the My Passportdrive on your Mac. Open the Finderapp to see all drives. Click on the Findericon in the dock. Find the My Passportdrive in the list. It should be under Devicesor Locations.
Click on the My Passportdrive to select it. Make sure it is the correct drive. Double-check the name and size. This step is very important. Choosing the wrong drive can cause problems. Be careful and take your time.
Selecting Format Options
Choose the right format for your My Passport. It helps your Mac read it easily. ExFAT is a great choice. It works with both Mac and Windows. You can also pick Mac OS Extended. This is best for Mac only use. APFS is another option, good for new Macs. Think about how you use your drive. This helps you pick the best format. Always back up your files first. Formatting erases everything. Keep your data safe. Follow these steps for a smooth process. It’s simple and quick. You can do it yourself. Just follow the guidelines.
Finalizing The Reformat
It’s important to complete the reformat process. First, confirm the new format. Your My Passport should show up on your Mac. If it does, the reformat worked. Next, check the drive’s name. It should match what you set earlier. This makes it easy to find. Always keep your drive’s name simple. This helps avoid confusion later.
Test your drive by saving a small file. Open it to make sure it works. This step ensures your drive is ready to use. Also, keep a backup of important files. This is a good practice to follow. It prevents data loss in the future.
Credit: discussions.apple.com
Frequently Asked Questions
How Do I Reformat My Wd Passport For Mac?
Open Disk Utility on your Mac. Select your WD Passport drive. Click “Erase. ” Choose “Mac OS Extended (Journaled)” format. Click “Erase” again to confirm. Your WD Passport is now reformatted for Mac.
How To Reformat An External Hard Drive For A Mac?
Open Disk Utility from Applications. Select your external drive. Click “Erase. ” Choose “Mac OS Extended” or “APFS. ” Click “Erase” again.
Can Wd My Passport Be Used For Mac?
Yes, WD My Passport can be used for Mac. You need to reformat it to a Mac-compatible file system like HFS+ or APFS using Disk Utility. This process will erase all data, so back up important files first. After reformatting, it works seamlessly with macOS.
How Do I Factory Reset My Passport?
To factory reset My Passport, open WD Discovery software. Select “Settings,” click “Drive Erase,” and confirm. This deletes all data. Backup important files before proceeding to avoid data loss. Follow on-screen instructions to complete the reset process efficiently.
Conclusion
Reformatting your My Passport for Mac is straightforward. Just follow the steps provided. It ensures your device works smoothly with your Mac. Regular backups help protect your valuable data. Make reformatting a routine task. It helps maintain your device’s performance.
Use simple tools for the process. Keep your files safe and organized. Your Mac will appreciate the effort. Always check compatibility before starting. Happy computing with your refreshed device!