
Have you ever felt the frustration of trying to access a file on your Passport external hard drive, only to realize it’s not compatible with your Mac? You’re not alone.
Many Mac users face this challenge, and it’s not just an inconvenience—it’s a roadblock to your productivity. But don’t worry, there’s a simple solution, and it starts with reformatting your Passport for Mac. Imagine the relief of seamlessly transferring files, backing up important data, and knowing your Passport is perfectly synced with your Mac.
By understanding how to reformat your Passport, you can unlock its full potential and enjoy a smoother, more efficient digital experience. In this guide, we’ll walk you through the process, step by step, ensuring you can confidently reformat your Passport without any technical hiccups. So, if you’re ready to transform how you use your external hard drive and make your life a little easier, keep reading. Your Mac-friendly Passport is just a few steps away.
Credit: recoverit.wondershare.com
Backup Important Data
Saving your files is very important. Before reformatting, copy your data. Use an external drive for this. It keeps your files safe. Photos, documents, and videos need special care. Always double-check your backup. Make sure nothing is missing. You can also use cloud services. Google Drive or iCloud are great options. These services are easy to use. They keep your data safe online.
Ask a friend if you need help. Friends can make things easier. Backup might take some time. Be patient. Do not rush this step. Your data is precious. Losing it can be bad. Always backup before formatting. It saves you from trouble later.
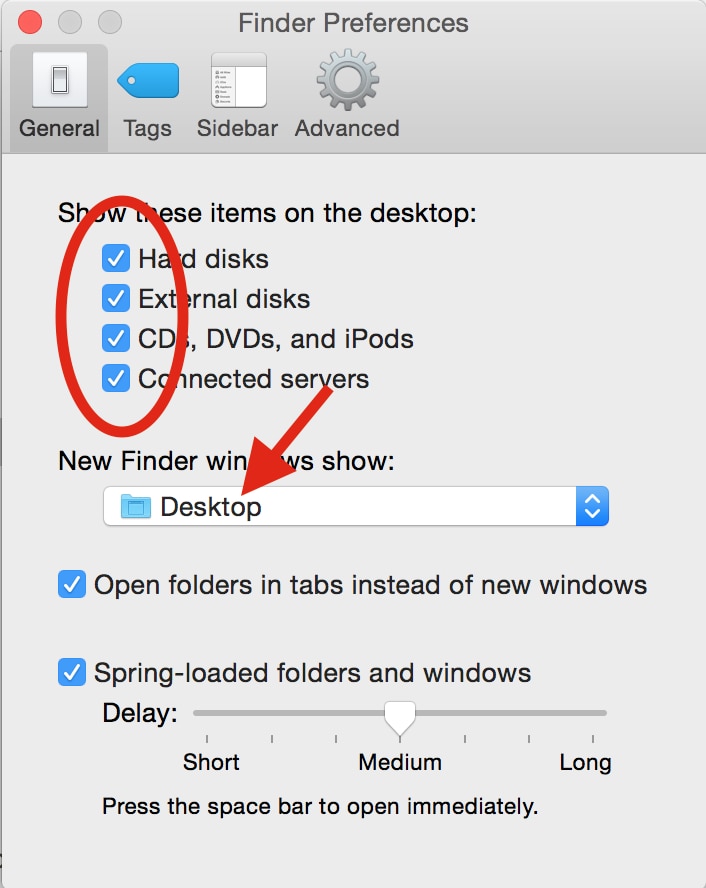
Connect My Passport To Mac
First, grab your My Passport drive. Plug the USB into your Mac. Wait for the Mac to recognize it. The drive will appear on the desktop. If not, check the connection. Make sure the cable is secure. Next, open Finder. Look for your drive under “Devices”. Click to select it. You can now access the files. Make sure you have enough space. Backup important files if needed. You might lose them during reformat. Always be careful.
Access Disk Utility
Open your Mac. Click on the Findericon. It looks like a blue face. Look for the Applicationsfolder. Double-click it. Inside, find the Utilitiesfolder. Open it. Now, you see many tools. Find Disk Utility. It has a silver hard drive icon. Double-click it to open.
The Disk Utility window appears. You see a list on the left. Here, find your My Passportdrive. Click on it once. It turns blue. This means it is selected. Now, you can use the tools at the top. We are ready to reformat.
Credit: www.easeus.com
Select My Passport Drive
First, plug your My Passportdrive into your Mac. You will see the drive icon on your desktop. Click the icon to select the drive.
Open the Disk Utilityapp on your Mac. You can find it in the Utilities folder. Look for the drive name on the left-hand side of the app. Click the drive to select it.
Make sure you have selected the correct drive. Double-check the drive name and details. This step is important to prevent data loss.
Choose Format Options
Selecting the right formatis important. Mac supports various formats. Each format has unique benefits. Consider your needs. ExFATis great for compatibility. It works with Windows and Mac. APFSis ideal for Mac users. It is fast and secure.
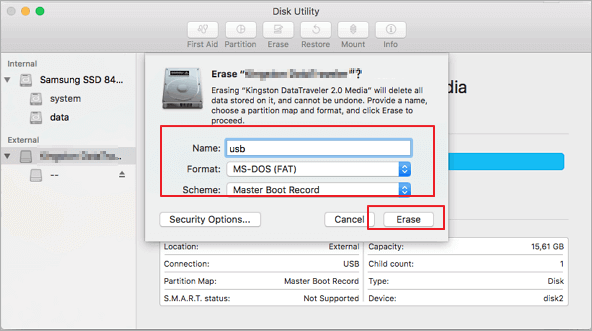
To format your drive, connect it to your Mac. Open Disk Utility. Locate your drive in the list. Click on it. Choose the Eraseoption. Pick your format from the menu. Follow the instructions.
Formatting erases all data. Ensure you back up important files. Choose a format that fits your usage. ExFAT is best for sharing files. APFS offers better performance on Mac. Choose wisely for your needs.
Initiate Reformat Process
First, plug in your Passport drive to your Mac. Open Finder and look for the drive on the left. Click on it to select. Next, go to Applications and open Utilities. Find and open Disk Utility. In Disk Utility, choose your drive from the list.
Then, click on the Erase button at the top. A window will pop up. You need to choose a format. Select Mac OS Extended (Journaled) or APFS. Name your drive if you want. Now, click Erase again. Wait for the process to finish.
Finally, your drive is ready for use with a Mac. Remember, this will delete all data on the drive. Always back up important files before starting.
Credit: discussions.apple.com
Frequently Asked Questions
Can Wd My Passport Be Used For Mac?
Yes, WD My Passport can be used for Mac. You need to reformat it to be compatible with macOS. Use Disk Utility for formatting. Ensure you back up data before reformatting. Once formatted, it works seamlessly with Mac for storage and backup needs.
How Do I Format My External Hard Drive For Mac?
Open Disk Utility, select your external hard drive, and click “Erase. ” Choose “Mac OS Extended (Journaled)” format. Click “Erase” again to confirm. Wait for the process to complete, then close Disk Utility. Your external hard drive is now formatted for Mac use.
Ensure you back up data before formatting.
How Do I Factory Reset My Passport?
To factory reset My Passport, connect it to your computer. Use WD Discovery software, select “Erase” under “Drive Settings,” and follow the on-screen instructions. This will delete all data on the drive. Ensure you back up important files before proceeding.
How Do I Fix My Passport For Mac?
Check for software updates, then repair the disk using Disk Utility. Reformat if necessary, ensuring data backup.
Conclusion
Reformatting your passport for Mac is simple and quick. The steps outlined ensure a smooth process. Start by backing up your data. Choose the right format for your needs. Follow the instructions carefully to avoid mistakes. Remember to check compatibility before proceeding.
Troubleshooting tips can help resolve common issues. Your passport will be ready for use after successful formatting. Stay organized and enjoy seamless storage solutions. With practice, this task becomes easier over time. Keep your files secure and accessible. Embrace the benefits of a well-formatted passport on your Mac.