
Imagine planning your dream vacation or an important business trip, only to realize you need a passport photo. You might think you need to rush to a photo studio or find a special booth.
What if I told you that you can easily take a perfect passport photo right on your iPhone? That’s right, you have everything you need in the palm of your hand. By the end of this article, you’ll have the simple steps to create a professional-quality passport photo without leaving your home.
No more long lines or extra expenses. Plus, you might have a little fun playing photographer! Your iPhone is more powerful than you think, and with a few tips, you’ll be ready to capture that perfect shot. Read on to discover how easy it is to turn your phone into a convenient photo studio.
Choosing The Right App
Finding the right app is important. Apps help make passport photos easily. Some apps are free. Others need payment. Check reviews before downloading. Good reviews mean users are happy. Look for features like resizing and cropping. These help make the photo perfect. Ensure the app follows passport photo rules. Rules include size and background. Avoid apps that have low ratings. These might not work well. Try using apps with easy instructions. Clear steps save time. Explore apps with editing tools. Tools help fix photo mistakes. Select an app that fits your needs. Right choice makes process easy.
Credit: www.idownloadblog.com
Setting Up Your Space
Find a spot with good lighting. Natural light works best. Stand near a window. Avoid shadows on your face. Make sure the background is plain. A white wall is perfect. Keep your iPhone steady. Use a tripod if possible. Ask someone to help you.
Wear simple clothes. No patterns or logos. Keep your hair neat. Show your full face. Don’t smile too much. Just a little smile is fine. Look straight at the camera. Hold your phone at eye level. This keeps the photo balanced.
Lighting Tips
Good lighting is key for a great photo. Use natural light for the best results. Stand near a window during the day. Avoid direct sunlight on your face. It can cause harsh shadows. Soft, even light is ideal. Turn off any overhead lights. They can create shadows. Use a plain white wall as your background. Make sure it’s well-lit. This helps your photo look clear. Check for any shadows on your face. Adjust your position if needed. A well-lit photo looks professional.

Credit: www.youtube.com
Perfecting Your Pose
Stand straight and keep your head up. Look directly at the camera. Your face should be in the center. Remember to keep a neutral expression. Avoid smiling or frowning. Keep your mouth closed. Eyes should be open and visible. Make sure no hair covers your eyes.
Choose a plain background. White or light colors work best. Ensure good lighting. Shadows can ruin the photo. Avoid wearing hats or glasses. These can hide your face. Follow these tips for the best result.
Editing And Cropping
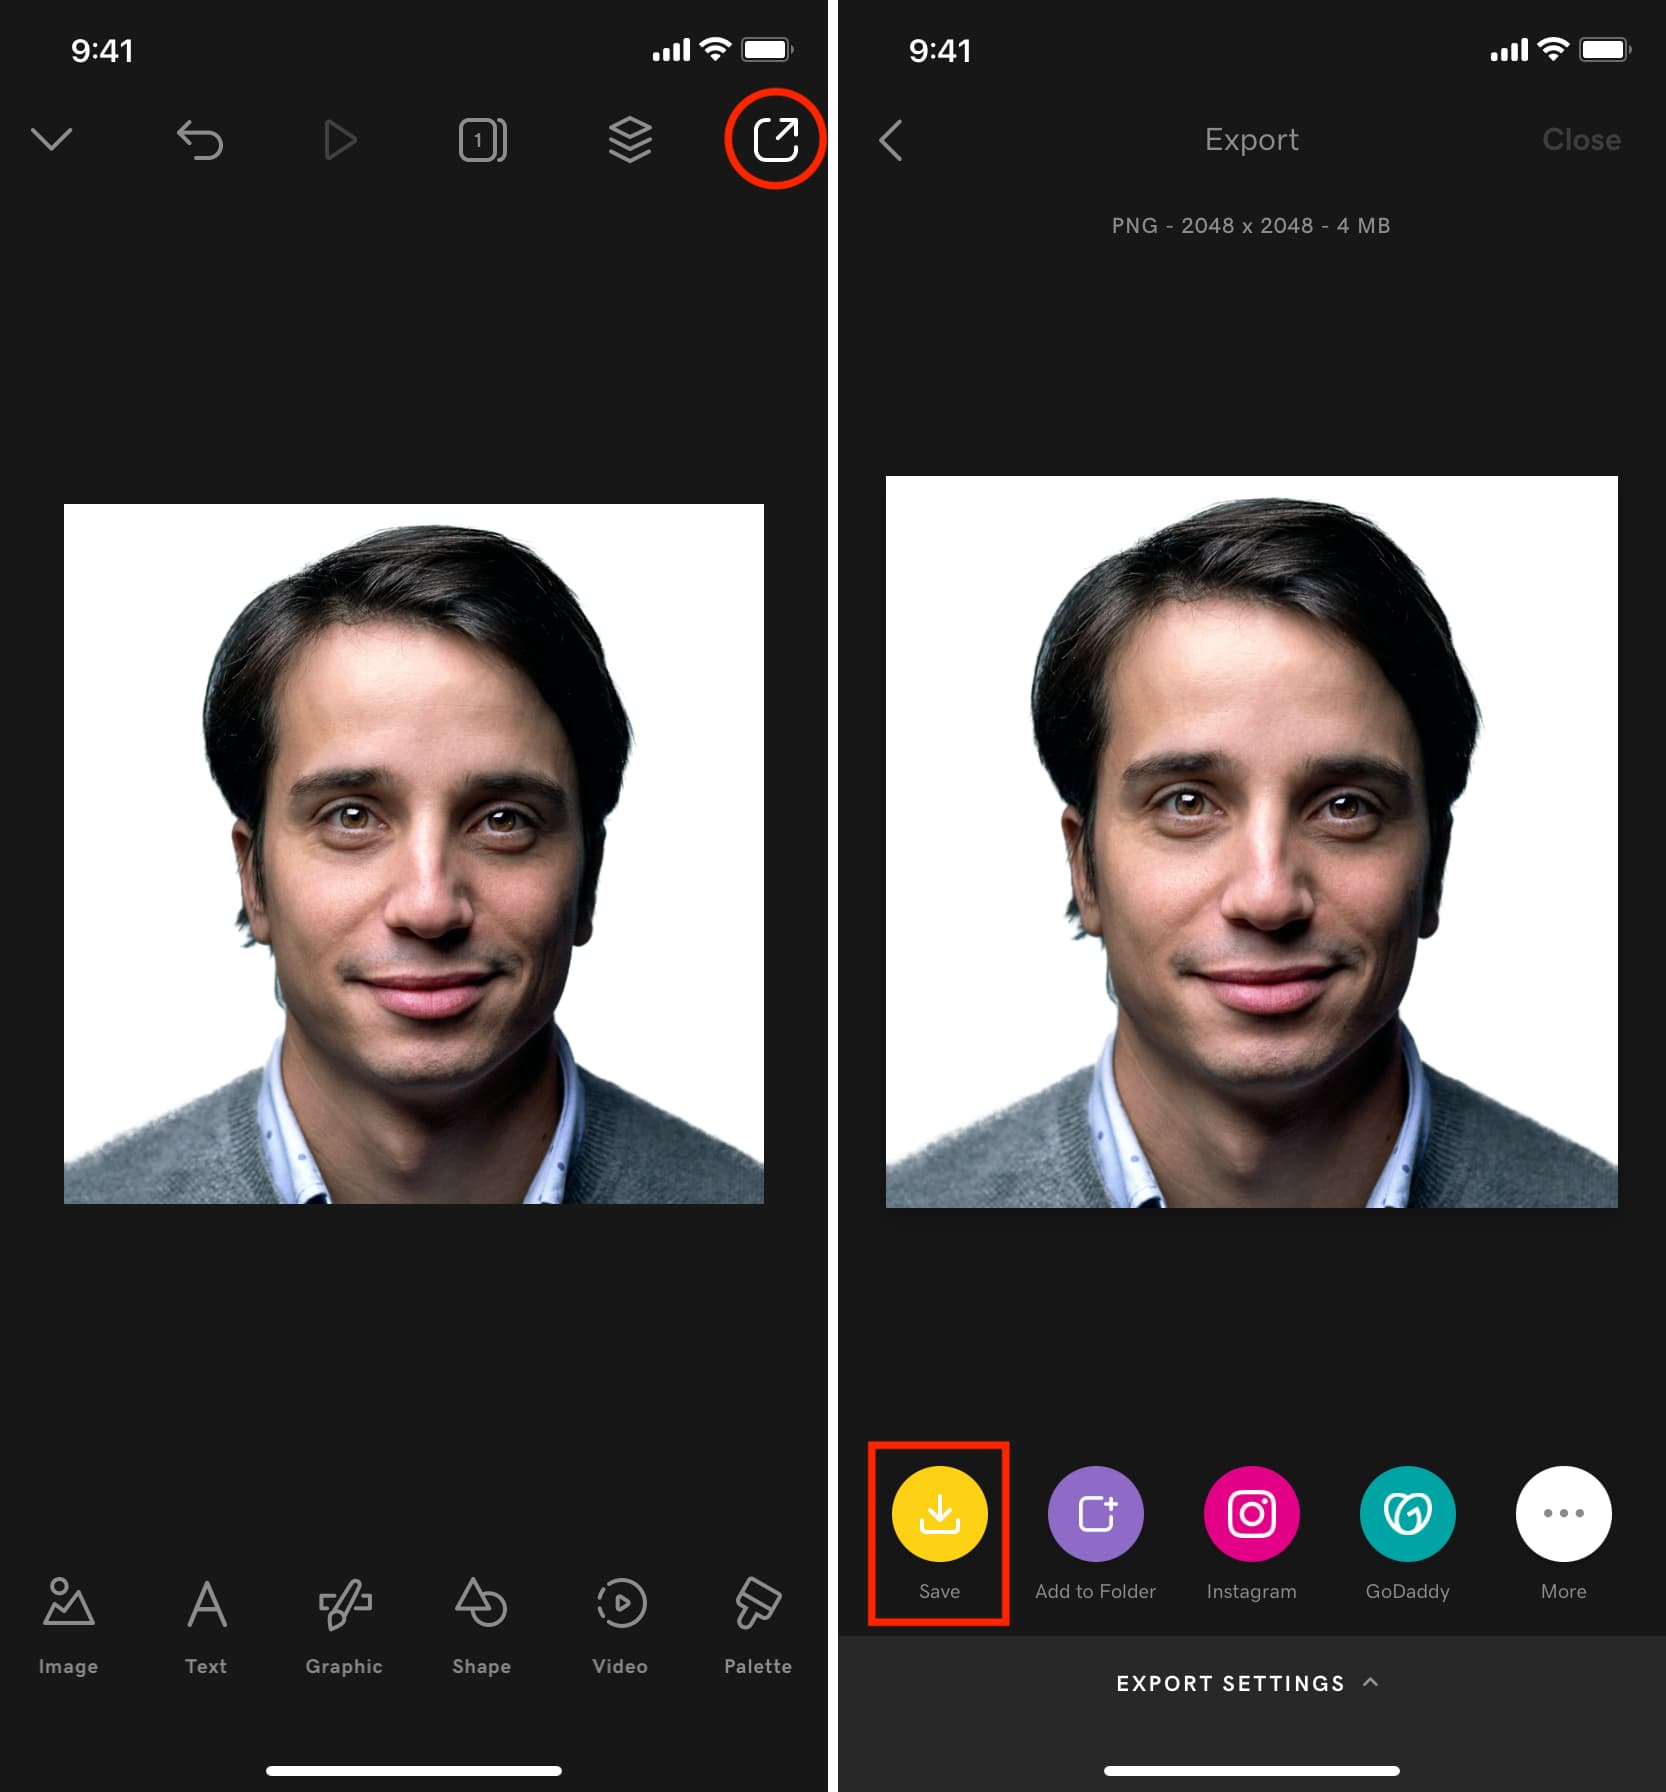
Open the photo on your iPhone. Use the Photos appto begin. Tap on the Editbutton. This is at the top right of the screen. Select the croptool. It looks like a square with arrows. Adjust the photo to the right size. Make sure your head fits in the frame. Leave a space above your head. This makes the photo look better.
Adjust the brightnessand contrast. Use the sliders to do this. Make sure the photo is clear. Avoid shadows on your face. Use the auto-enhancebutton if needed. This will improve the photo quickly. Once happy, tap Doneto save changes. Now, your passport photo is ready!
Credit: passport-photo.online
Printing And Saving
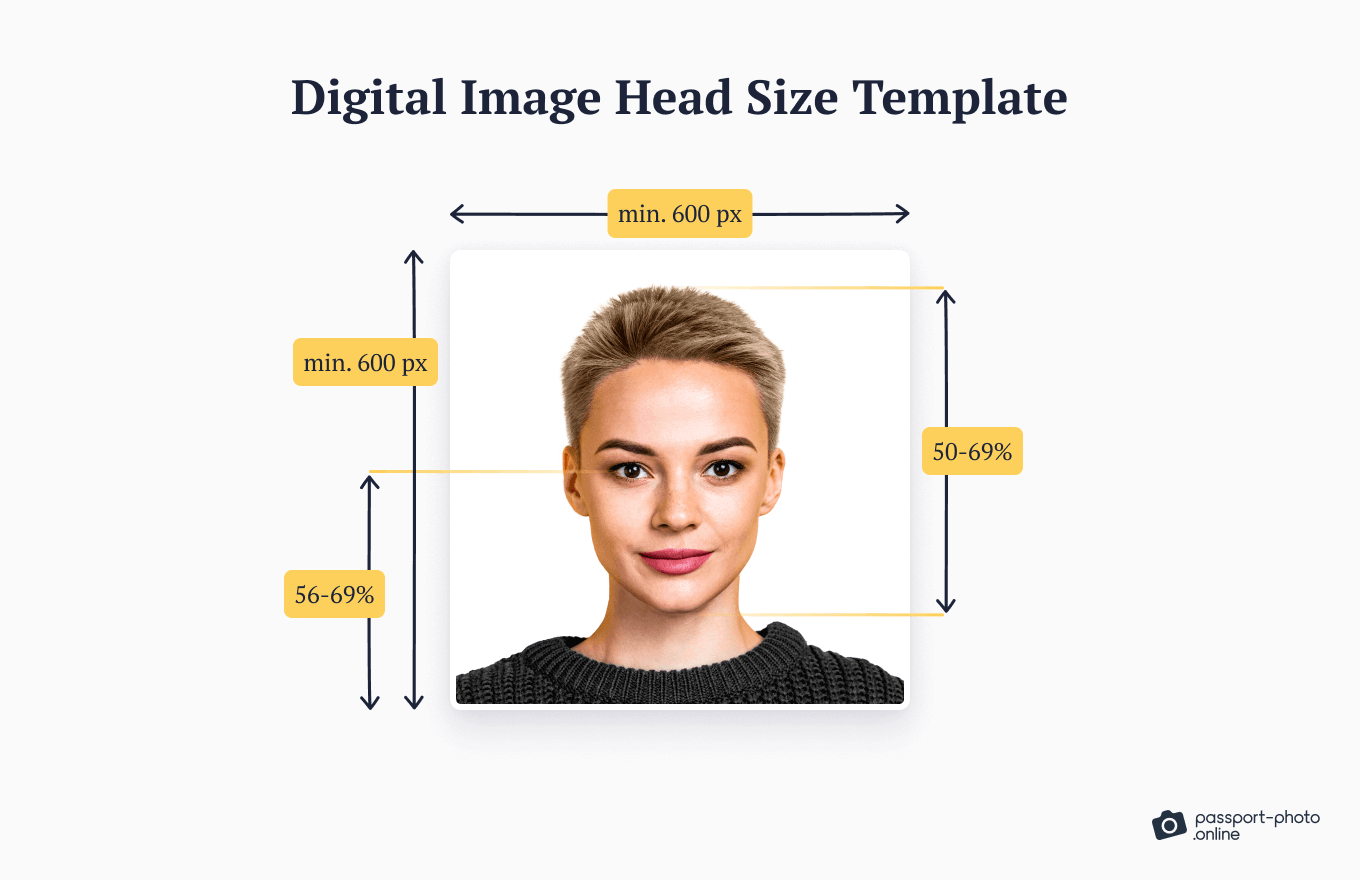
Save your photo on your iPhone first. Use the Photos app to do this. Open the photo and tap Share. Then, tap Save Image. Now, your photo is ready. To print, find a good photo printer. Many people use stores for this. Walgreens or CVS can help. They print photos quickly. You can also use a home printer. Make sure it prints high-quality photos. Check the size before printing. A passport photo must be 2×2 inches. You can adjust this in the printer settings. Print on glossy photo paper. It makes the photo look nice. After printing, store your photo safely. Keep it flat and dry. This way, it won’t get damaged.
Frequently Asked Questions
Can You Use Your Iphone To Do A Passport Photo?
Yes, you can use your iPhone to take a passport photo. Ensure proper lighting and a plain background. Follow passport guidelines for size and positioning. Use apps designed for passport photos to ensure accuracy.
How To Turn An Iphone Photo Into A Passport Photo?
Open a photo editing app on your iPhone. Crop the image to passport dimensions, typically 2×2 inches. Adjust brightness and contrast as needed. Save the edited photo and print it on high-quality photo paper. Ensure the background is plain and the face is clearly visible.
How Do I Make A 2×2 Passport Photo On My Iphone?
Use the Photo Editor app to crop the image to 2×2 inches. Adjust brightness and contrast. Save and print the photo on photo paper.
How Do I Make A 2×2 Photo For My Passport?
Use a camera or smartphone to take a clear, well-lit photo. Crop it to 2×2 inches using photo editing software. Ensure the background is plain white. Print on high-quality photo paper at 300 dpi resolution. Verify the photo meets passport guidelines before submission.
Conclusion
Creating a passport photo on your iPhone is simple and convenient. You need the right tools and a little guidance. With proper lighting, the photo looks professional. Ensure your background is plain and neutral. Follow the size guidelines for passport photos.
Use apps to edit and crop easily. Verify the photo meets official requirements before printing. This saves time and hassle. Now, you’re ready for your next adventure. Your passport photo is just a click away. Enjoy the ease and efficiency of using your iPhone.